Built-In Accessibility Features
Providing Accommodations
Dictate to iPad
|
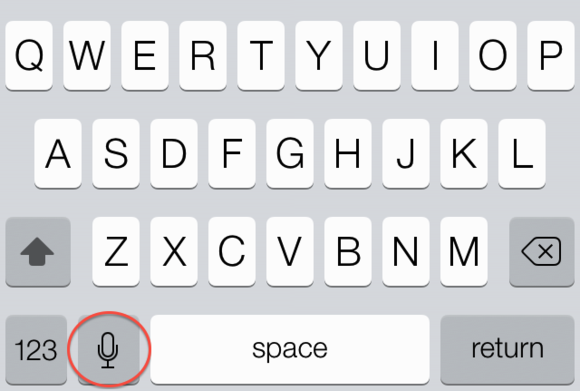
What it does: Students can speak to their iPads, and the iPad will write down what they are saying. This can save time for everyone but especially for those who struggle to use a keyboard or spell correctly.
How to do it: In Settings, go to General. Tap Keyboard. Tap Enable Dictation. Then, look for the microphone to the left of the space bar. Be sure to reread what the iPad has written down, and watch out for punctuation. Hint: Say "new line" to start a new line; say "numeral five" to dictate a 5, and more hints here. |
iPad Reads Selected Text
|
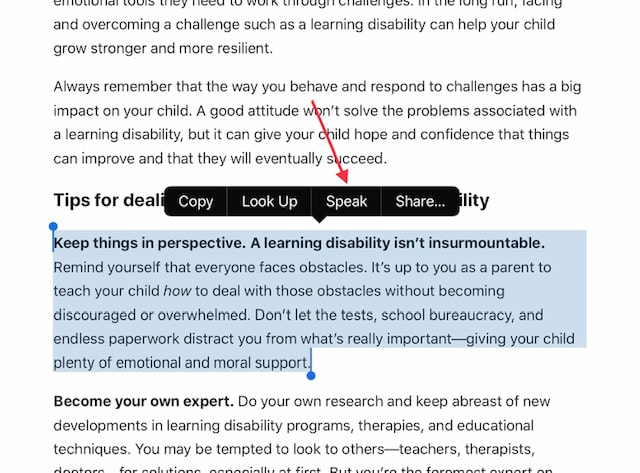
What it does: Students can highlight text and tap "Speak" to have the iPad read the text out loud. This could help when reading passages, or students can listen to text they are writing to be sure it makes sense.
How to do it: In Settings, tap on Accessibility, then tap Spoken Component, and turn on Speak Selection. Now, almost anytime you highlight something, you'll see an option to "Speak." Hint: You can tap on "Voices" in the same section of Settings to choose from dozens of different voices. |
Reader View to Reduce Distractions
|
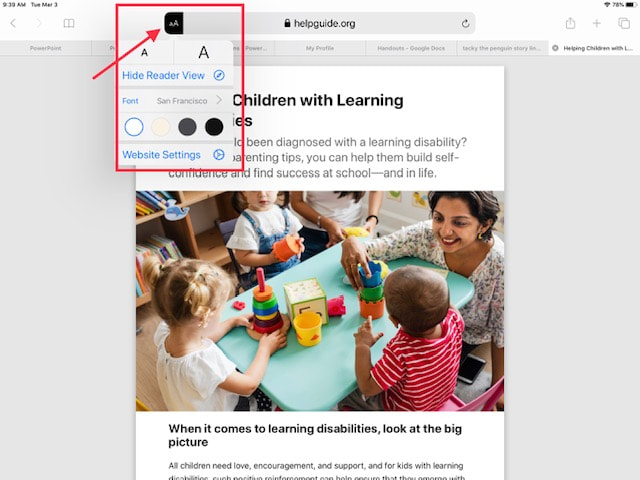
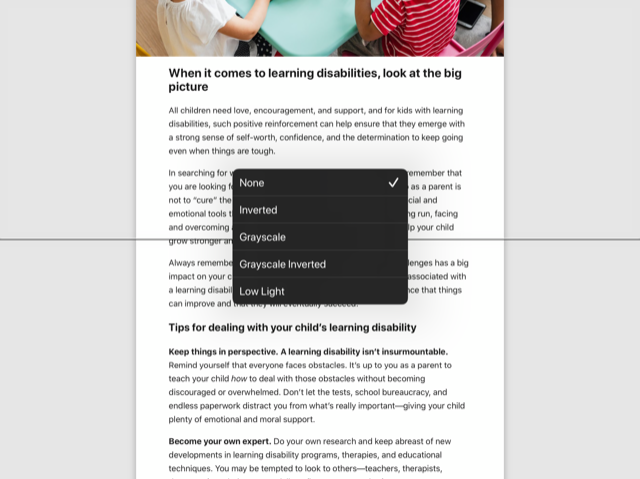
What it does: When reading an article on Safari, Reader View will remove ads, comments, sidebars, and other distractions from the screen. It also allows the user to adjust the font, font size, and background color to make it easier to read.
How to do it: Next to the URL or web address in Safari, tap on the 3.5 lines on the left. On the right, tap on the AA to open a menu to change the font, font size, and background color. If you don't see the lines, that particular webpage does not have Reader View available. Hint: Only webpages with one main block of text will allow you to use Reader View. |
Guided Access to Stay on Task
|
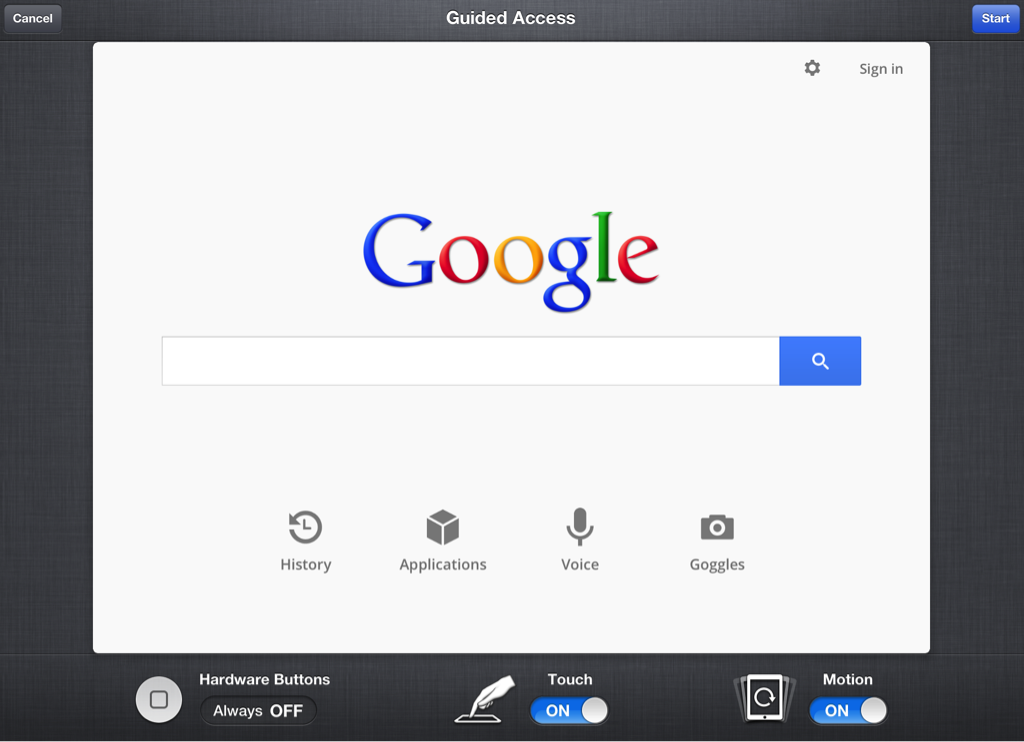
What it does: Guided Access allows a teacher to lock a student into an app or even a specific area of the screen. A passcode is required to exit the app. This could help students by removing the temptation to "multi-task."
How to do it: Triple-click the home button, circle any areas of the screen that you want to disable, set a passcode (required to exit Guided Access), then tap Start. You can also set a time limit. Hint: You can use Apple Classroom to lock in a single student or even the whole class without touching any of their iPads. |
Zoom
|
What it does: The Zoom feature focuses in on a certain part of the screen. Teachers can use this as a teaching tool when mirroring their iPad, and students can use this to magnify part of their screen. Students can also add a filter, such as grayscale or inverted colors.
How to do it: In Settings, tap Accessibility. Choose Zoom. Use three fingers to double-tap the screen. Users will see several options. To close the zoom window, double-tap with three fingers again. Hint: You can set a filter to come on in the zoom window. |
Magnifier
|
What it does: The Magnifier feature works like a digital magnifying glass. It uses the camera on your iPad to increase the size of anything you point at, so you can see the details more clearly. You have the option of capturing a still image and moving it around your screen.
How to do it: In Settings, tap Accessibility. Choose Magnifier. To access it at any time, triple-click the home button. Turn off with a triple click as well. Hint: Consider using an iPad stand for added stability when using this feature. |
Text Size
|
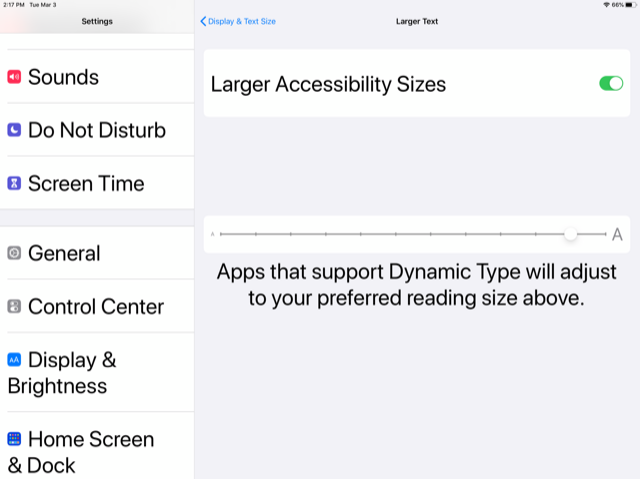
What it does: Enlarging the text size helps those with visual impairments.
How to do it: In Settings, tap Accessibility. Tap on Display and Text Size. Choose Larger Text and use the slider to select the ideal text size. |
Invert Colors
|
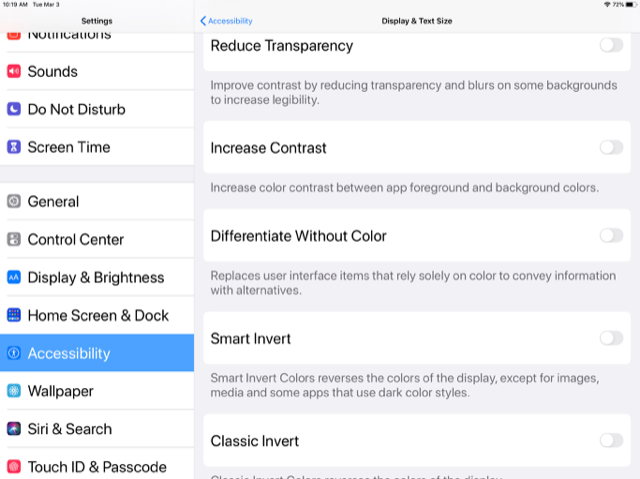
What it does: Invert colors changes black text on a white background to white text on a black background, which is easier on the eyes when reading in a dark room, or helpful for those with dyslexia. Grayscale may be helpful for those with color blindness.
How to do it: In Settings, tap Accessibility. Choose Display and Text Size. You will see several options for Displaying Text, including Reducing Transparency, Increasing Contrast, Differentiate Without Color, Smart Invert, and Classic Invert. To easily change your display back and forth, you can set up an Accessibility Shortcut at the bottom of the Accessibility menu. You can choose several options, and a menu will pop up with your choices when you triple-click the home button. Hint: If you only want a certain section of the screen to be inverted, use the Zoom feature explained above. |
Color Filters
|
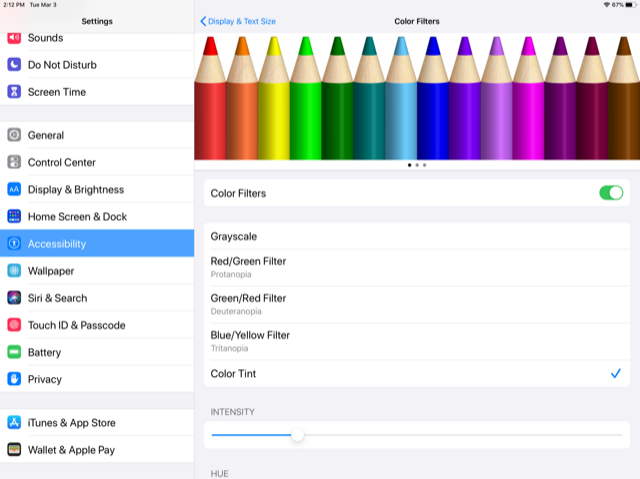
What it does: This is basically like putting a colored overlay on your iPad. The color choices are infinite! There are preset filters for those with certain types of color blindness (Protanopia, Deuteranopia, Tritanopia) as well as slider bars to customize your filter.
How to do it: In Settings, tap Accessibility. Choose Display and Text Size. Tap on Color Filters to see several color options. To customize the hue, tap on Color Tint. Otherwise, choose a preset filter. You can add this option to your Accessibility Shortcut to easily turn it off and on when you triple click the home button. |
Multitasking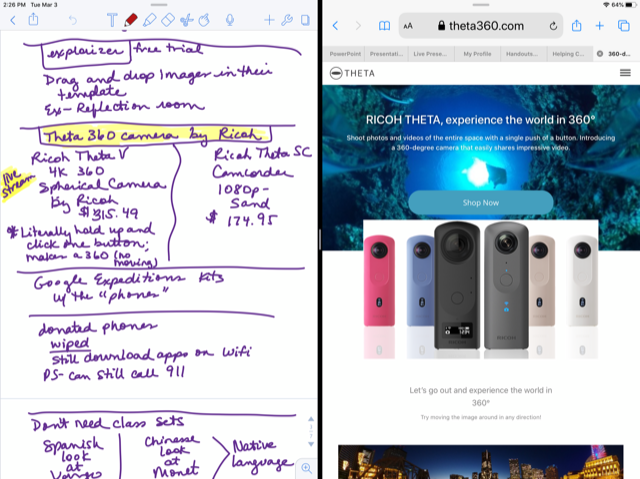
|
What it does: Use multitasking to work with two apps at the same time, answer email while watching a video, switch apps using gestures, and more.
How to do it: Use Multitasking gestures on your iPad to quickly see the app switcher, switch to another app, or return to the Home screen. Here's how:
|
Built in Dictionary
|
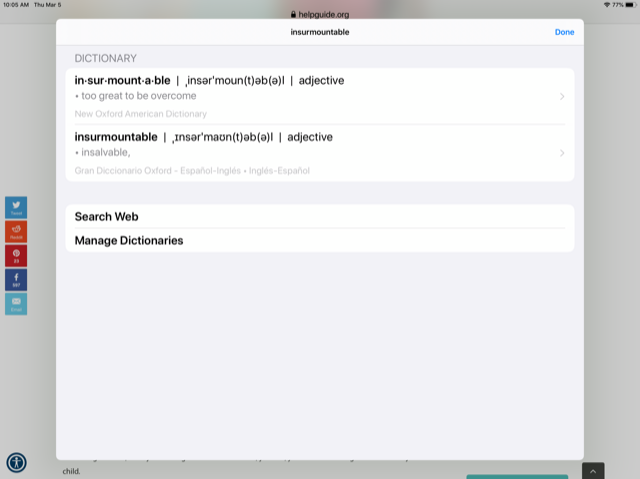
What it does: Defines highlighted word. It is possible to add dictionaries for words in other languages, as well, which could help those learning English as a second language.
How to do it: Highlight a word and tap Look Up. Tap on the definition to get more information, or tap Manage Dictionaries to add dictionaries in other languages. |
Keyboard Shortcut
|
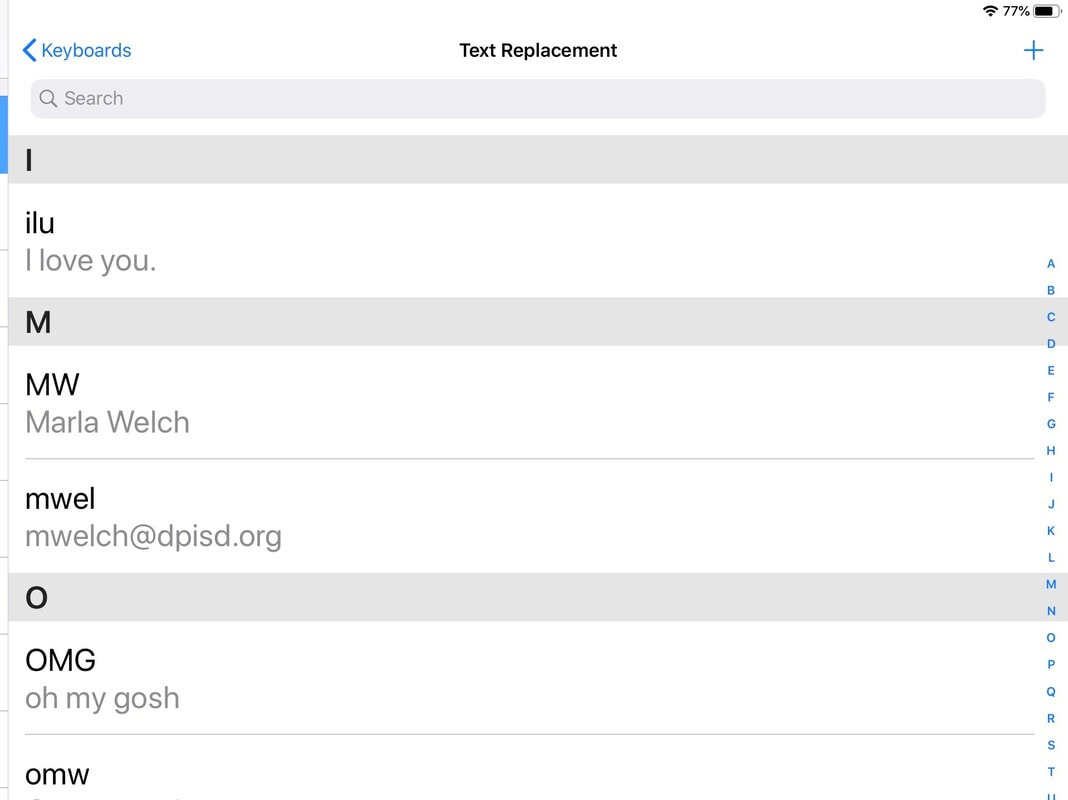
What it does: Program a keyboard shortcut for commonly used phrases. For students with their own devices, they can program a shortcut that will type in their name if they type their initials, for instance. This can help save time for those that struggle to use the keyboard.
How to do it: In Settings, under General, tap on Keyboards, then tap Text Replacement. Tap the plus sign in the corner and add your phrase and its shortcut. When you type the shortcut, the phrase will appear. |
